Thursday, 6 December 2012
Project Update
This is my final outcome for this project after following my proposal. I am very happy with the quality and detail which is in the images and also it shows my development as I have took into account with the presentation of the outcome.
I feel that the quality of work as improved so much and really has gone to a professional style now, and also in me and my style of working.
This project has opened my eyes to what is a professional level and a amateur level.
I am happy with what knowledges and skills I have leant in regards to post-productuin and I feel this will help me into the industry, as I am now not going for the top-up at a university.
I feel I wouldn't successfully finish a third year at university as I feel my academic level is not up to the right level.
Project Evaluation
In this Evaluation I am going to talk through this project, and talk about each stage of the assessment, which I have done to get to my successful output.
Proposal- As a part of another module I needed to write a proposal for this project. The main objective of this brief was to enhance my professional postproduction skills as this would benefit me in my next leg of my career.
At the start of this brief and when I was writing my proposal I was hoping to enter and start a third year at a number of Universities to fulfil my full degree, or to look and seek and enter in employment and the photography industry. I have now decided to not fulfil my third year top up at university, as I feel I don’t have the academic knowledge and skills to successfully complete the final year.
“On successful completion of the degree, you will have gained a broad knowledge and critical understanding of the principles of photography and knowledge of emerging aspects of the discipline and those at the forefront of debate.” Open College of arts. (2007), I feel this shows that this final year will only teach me about the more academic principles of photography and not help me in a successful job in the photography industry, I feel I will have to do this myself and the quicker I start looking the better.
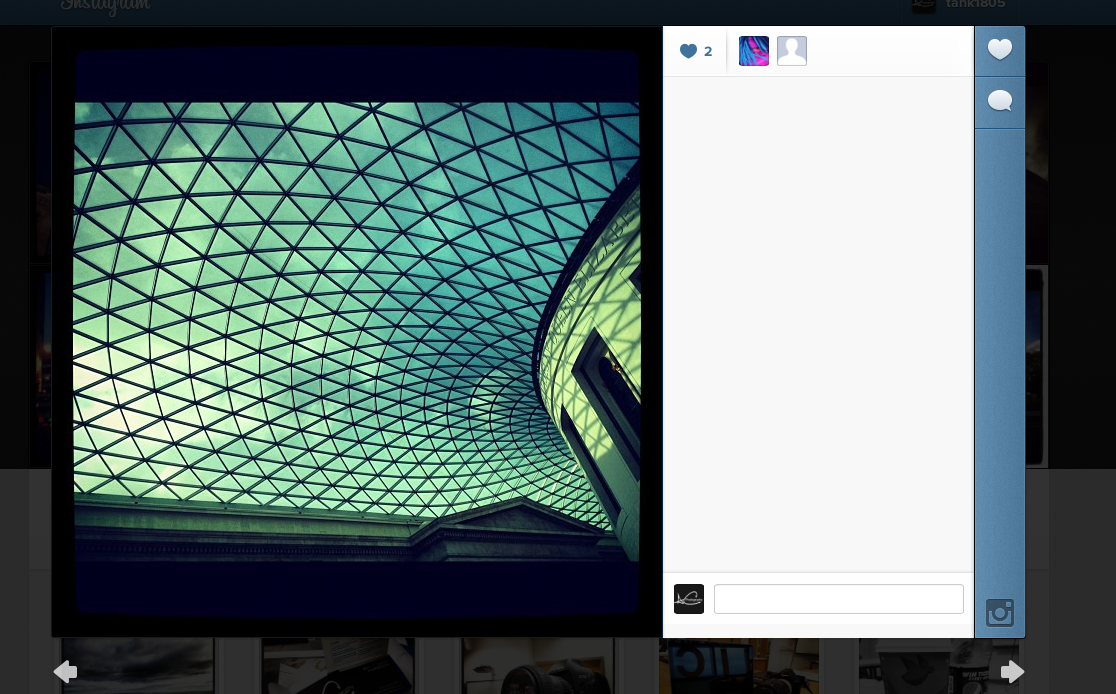
Research- Within the mountains of research which is involved in a successful project at this level, I really feel I have learned and understood these new elements of photography which I have researched. Some interesting points which have come up in my developing research were that the powers of the social networking can change the trends of peoples behaviour, and how they go by there day to day living and communication with others. I strongly believe that the Social networking site Instagram has had a massive impact on the trends of 2012 in post production in photography.
” Instagram is the new Polaroid. It may be the new Facebook. And we’d bet our Valencia filter that it’s the latest medium of lowercase “a” art.”
Mantey, J. (2012).
“Professional art institutions aren’t ignoring the app’s popularity either. The Columbus Museum of Art currently has a small show of Instagram photographs. CMA asked Instagrammers to take images that best represented eight words, such as curiosity and joy.” Mantey, J. (2012). These show that Instagram is a powerful tool, which has an effect over the industry and is being recognised in it too., also it links in with my other research regarding phoneography
Development- I have enjoyed doing this development for this project as I have been able to not just shoot the images, but there have been a number of other things, which I have needed to think about which has challenged me and my knowledge and skills. This project was all about the post production stage of photography so I didn’t want to take a lot of time taking the images, but I needed to think how I was going to do them as I wanted them to been perfect inner camera has I didn’t want people to believe I was using photoshop to mask bad images up.
“‘You can’t make a silk purse out of a pig’s ear” – Photoshop cannot correct a badly focused image or a badly composed one. It can correct things the camera got wrong, like white balance, and you can go to any extremes in processing to create a particular effect if that is what you want. If you want to visually transform an image then that’s an entirely different kettle of fish. You can combine images, change skies, get rid of blemishes, clone out things, get rid of noise, desaturate parts of an image, selectively darken or lighten parts of a image- these are the things that Photoshop excel in.” Buckley, H. (2010). This in turn supports my feelings on what is the best and right reasons of using photoshop, also with out using photoshop or another manipulation software you wouldn’t be able to produce images in the style of HDR because of the multiple exposures images which you merge into the final image.
The fInal outcome-I am very pleased with the overall final outcome of this project, because of how I have been able to stick to my proposal and I have been able to do what I set out to do. I feel without following the Proposal, research, development and final piece of artwork method, I don’t think I would have been able to produce to this high quality standard, which I have done. I feel the image quality of all the final images are to a standard which I am happy to put into my portfolio, as I also want to show my very best and must professional looking work. I sadly didn’t get my final images professionally printed but I will do this if and when I need to.
I feel that my work as gone to another level because of the elements I am adding to my work, like the awareness of light and lighting on the subject, also I am able to criticise my work and I am able to make a statement in my imagery so it will professionally communicate to the audience which are viewing it.
Conclusion- “You’re only as good as your last photograph.” Krupsaw, W. (2012). This is something I feel has helped me to put in 110% into this project . I feel that this saying is key and wholes so much meaning behind it because it’s true, I have started now to pride myself on my last image I took, I think by doing this It will help me to improve myself in my development to become a professional photographer and also in my work. I also feel because of the success of this project, it will put me into good spirits for next year, which I feel is going to be the most challenging quarter of the degree as I will be on the home stretch to complete my degree.
Final Design and logo
Here is my final business card, letter head and final layout for my self branding module.
Overall I am very happy with the final outcome of this module as it shows what I have learnt with the different graphic softwares and techniques about layout and the overall rules of what you can and can't do when designing a logo or brand.
By doing the understanding the media 2 module, it has help me to understand how create communication in branding and what I want it to visually say to my clients.
"You need to get a ID for you and your style of working as, if you don't you will not get noticed."Rankin. (2012) I feel this is very important and good advice when creating a ID for yourself as if it is not original it will not get notice and you will fall into the background of everyday life.
Self branding Module
As a part of my modules I am asked to brand myself and to create a ID for my style and profession. Here are some photos are of my research I have done to get to my final outcome.
I thought at the start of this module I was worry about my success of the module as I didn't have any graphic knowledge or any skills regarding the software, but I had a confidents boost at the start of this module after attempting my first draft hand rendered designs.
The feedback I got off this was positive and it seem that it was not just about having software knowledge, but more about having a idea of what I wanted and how I wanted it.
I also have look at different logo's, business cards and website design for inspiration for my final design.
A key factor in my designing was that I didn't want a cliche standard photography logo with a obvious connected visually which photography e.g having a camera as a logo.
Sunday, 2 December 2012
Spode Experience
I was asked to document this exhibition at Spode in Stoke, Overall I enjoyed this day as it was a chance to test all the new skills which I had learned over the summer and in this next few months.
I feel my work and way of working has improved and got more professional, I feel documenting the day easy and fun as on top of photographing I was helping other students in my year and the first year to set up and to show them how to control there camera in the different type of lighting there was it there.
There was about 150 students there, going around five different areas of interest and being shown different techniques in pottery design and making, all there pieces of art they had created that day,was made into one big piece of art at the end of day.
I applied all my skills and knowledge into the using the old and weathered environment to my advantage and trying different camera position to work with the bare brick walls and dusty floors to get some different.
https://twitter.com/SpodeExperience
I have been doing some research on Instagram because of the connection with my project, I feel it has a large connection to my project, because my project is about post-production in photography. I have gone of the photography trends of 2012 and I feel that Instagram has played a large factor in setting the trends of 2012.
Instagram has been designed and set out to work as a social networking site too, because of it's similarities to twitter and Facebook.
"And, just like Facebook, Instagram is more or less a social network" This is off a article which I have read about the connection with Instagram and the big social networking sites, it was interesting to read that people believe that you can't have a Facebook or Twitter account without having a Instagram account.
"On Instagram, you can follow other users' photo streams as they post them and you can be followed back by those users (or other users) as well. Using the "Profile" icon located on the lower menu of the Instagram screen, you can search for friends by name or find friends that are already connected to you on other social networks like Facebook or Twitter."
www.instagram.com
http://instagram.com/tank1805
http://news.cnet.com/8301-1023_3-57508430-93/how-instagram-became-the-social-network-for-tweens/
http://webtrends.about.com/od/prof4/a/What-Is-Instagram-Wiki.htm
Vintage Style Photography Photoshop tutorial
A very helpful tutorial showing me how to create a normal image into a vintage style image. This tutorial was great because it showed me close-up of the different layers and tool boxes, now I have watched other tutorials and I have notice that some of them when not very clear and not very good quality, so it was abit of a guessing game when it came to editing the images.
I feel only the best vintage style images will happened, only if the images are of a old style or looking subject to start with, I have seen that a lot of people using Instagram are using this vintage style effect on there images. I don't feel that these images work well, because you are masking the model year with a vintage/sepia effect which will clash.
https://www.youtube.com/watch?v=yOcx45ifa7U
Feedback on a friends images
Feedback-After looking at a number of your albums, I feel your image quality is good and you understand the key elements to produce a good quality image with a normal digital camera. It will be interesting to see the difference in image quality when you start your DSLR as you will have more power over the camera control and this is put your skills to the test ( never shot in auto mode because you will never learn about the camera and what it can do). But I would say, that I was getting lost in some of your images as there was to much going on in them and that i was not sure what the image was trying to show or tell me, this is down to your subject matter. It maybe good for you to get into the mind set of thinking "less is more".
I feel this feedback is fair and helpful and will help him to understand abit more about what you need to get out of your subject matter when taking a image.
Doing the Visual Communication module has opened my eyes to what you need to get out of a image and what it communicates. I know no just by the light changing a fraction in the image, it can change the whole statement of the image and what it communicates.
Macro Photography Video
This is a video on a wildlife photographer which has over 30 years of experience, talking through some of her macro photography which she has done.
I feel this video is only for advance macro photography because of two elements which stood out in this video, and these were.
1,The quality of her work was to a level which you would expect from a master photographer and for someone who has been doing it as a living for a number of years.
2, The language which she was using to talk about her images and style of working was very professional and academic.
This video was full of tips and advice which will help me to get this professional look in my macro images for this project. Some of this she was saying, I feel were key and would have made the difference between a good and great macro image. One of the key things she said were about the importance of using light and back lighten subjects to give the image a professional look.
She says" One of the best things about macro photography is that, the details you see in the images are the details which are not picked up my the human eye." This gives macro a sense of excitement as you don't know what details are hidden in what is seen as a bland and boring subject.
https://www.youtube.com/watch?v=WMvRBDNyoX8
HDR Quick landscape tutorial
This was a nice and quick tutorial which I found on youtube, it shows you how to produce a HDR image which using a gradient filter in photoshop. I have not use this method when I was editing my images because I feel, its a simple and possible a amateur way of editing a image and wouldn't help me if I ever was editing or shooting a HDR in the photography industry.
There are a number of ways to edited a HDR image but where this tutorial was using 2 image, One exposed on the sky and one on the ground, I was using 3 images. One was exposed 2stops down, one image with the normal exposed and the last image was a image exposed 2 stops over, and when they were merge in photoshop this would give me a HDR image.I used this because I feel it shows my control and skills which my inner-camera knowledge.
https://www.youtube.com/watch?v=AWPLpz8uXjw
Subscribe to:
Posts (Atom)